Incoming Log Search
The Incoming Log Search is a comprehensive search tool which allows you to filter on all incoming messages over the past 28 days. In this page you can also access Quarantined messages, those that are in the Incoming Delivery Queue as well as those that are Archived.
To access the Incoming Log Search, in the Admin, Domain or Email level Control Panel, select Incoming > Logs.
Using the Log Search you can:
- Perform powerful filtering to find the results you need including:
- Filtering on message size and the From, To and CC headers
- Filtering on the outgoing IP used for delivering or attempting to deliver the message and the location of the sending server (based on the IP address)
- Perform various action on single or multiple messages
- Customize available actions on specific messages
- Regenerate the index to search all archived message content
- Export archived messages
- Create and email a report of your log search results (and schedule at a specified frequency)
Run Custom Log Search
In the Admin or Domain Level Control Panel, search incoming or outgoing logs by selecting Incoming > Logs or Outgoing > Logs
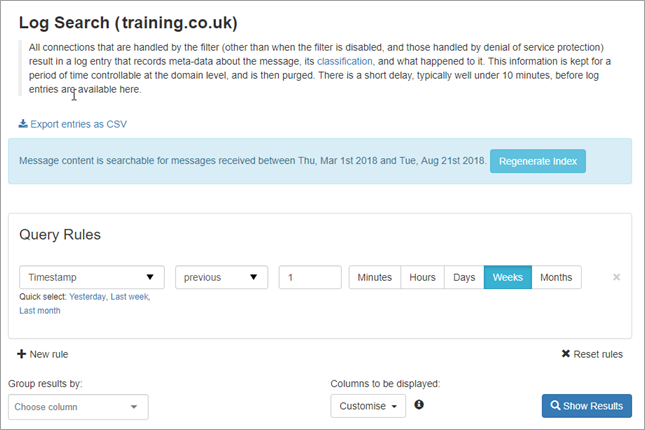
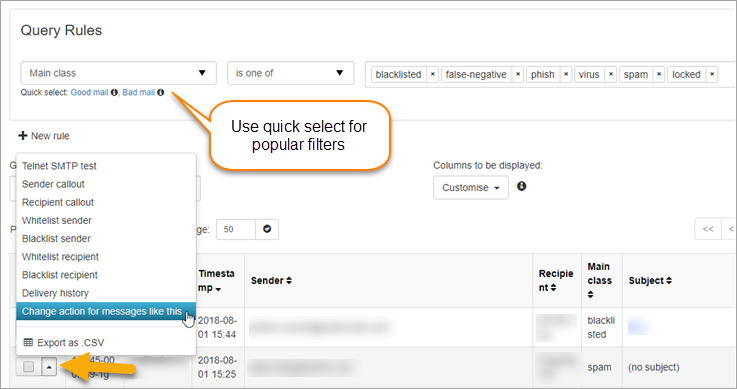
Query Rules Panel
The Query Rules panel allows you to customize your search filters. The default query rule for the incoming Log Search is the Timestamp rule.
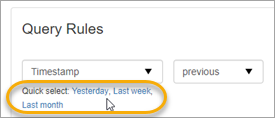
Use the shortcuts beneath the Timestamp filter to quickly select results from Yesterday, the Last week and Last month.
To Match all rules specified ensure that All is selected. Alternatively to allow partial matching select Any:
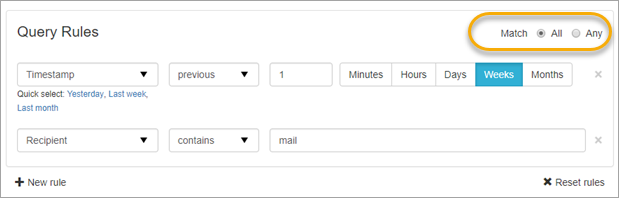
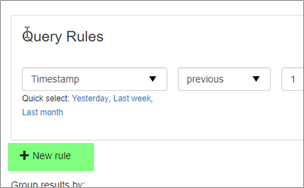
- Click on + New rule and select from the filter options available:
The Query Rules are constructed of three parts:
- The part of the message/metadata you are looking for e.g. sender, subject, To, From, CC, Sender location, message size etc. – Select from the first dropdown in the Query Rules panel
- The type of match e.g. contains, does not start with etc. – Select from the 2nd dropdown in the Query Rules panel
- The content you are trying to match – Select
The Status of a message tells you what stage the message has reached in the filtering process e.g. rejected, queued for delivery, quarantined etc. To search for messages with a specific status, use the Status rule and tick the checkboxes of the statuses you wish to include.
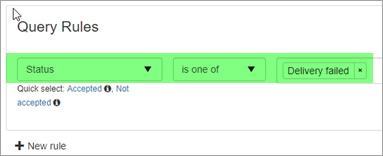
- If you wish, you can use the Quick select shortcuts provided e.g.Accepted; Not accepted.
- Once you have added the rules, use the Customise dropdown to select the fields you want displayed in the search results.
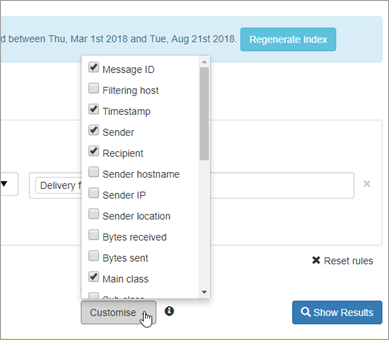
There are many options available, with the most popular choices outside of the defaults being:
- Main Class – How the message was classified which determines what happens to the message (e.g. temporarily or permanently rejected, for example, Spam).
- Sub Class – Why the message was given the Main Class that it was given. For example, if the message was classed as Spam, the Sub Class may be DNSBL (DNS Blacklisted).
- Delivery Data – Shows the destination mail server’s most recent response to the filtering server’s attempt to deliver. For example, if a message is accepted by the filter but can’t be found in the recipient’s Inbox, this field will show if the message was delivered to the destination mail server or not.
- Status – Shows the current status of the message. For example, Delivered, Rejected, Quarantined, Queued etc. Note that Rejected includes both temporary rejections (where the sender will most likely automatically retry delivery later) and permanent rejections (where the sender will not automatically retry).
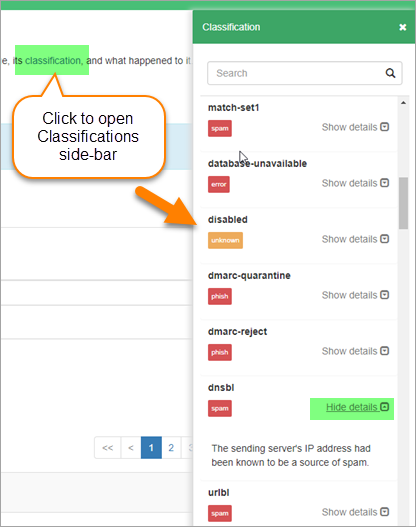
Click on the classification link in the page description at the top of the log search to display the Classifications side-bar which shows more information on the classifications available:
- Use the Group results by: dropdown and select from the list if you want to group the results by category. For example, to group the results by sender, select Sender.
- Once you have specified your filters, click on Show Results to run the search and display the results at the bottom of the page.
Actions Available on Log Search Results
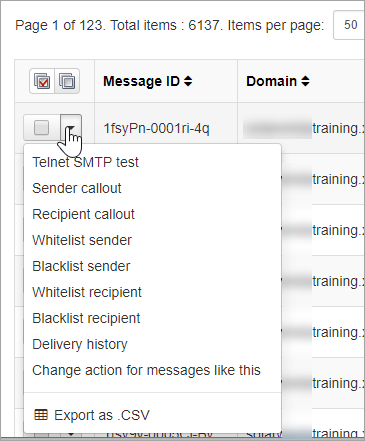
In the Search Results listed you can carry out a variety of actions including:
- Telnet SMTP test
- Sender callout
- Recipient callout
- Whitelist/Blacklist Sender/Recipient
- View Delivery History
- Change action for specific messages
- Export Log Search Results – Download the report in Excel CSV format – using the Export button.
Regenerate Index
If you want to be able to search all archived message content in your domain, click on the Regenerate Index button at the top of the Domain Level Log Search page.

The index is regenerated and any messages archived since the last time the index was generated are added to the index – allowing you to search all archived message content for that domain.
Add Customized Action Using Log Search
- Once you have run your log search and the search results are listed, select the dropdown to the left of the message and select Change action for messages like this.
- The Add a new custom action for emails dialog is displayed with the fields pre-populated according to the message.
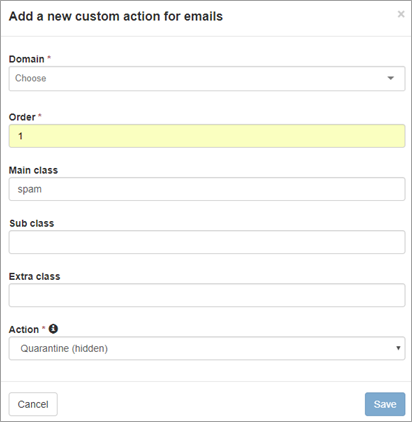
- Click Save.
The new custom action is listed in the Customize actions page accessible from the Admin and Domain Level Control Panels.
You can now use the dropdown to the left of the new action and select Find similar messages to redirect you to the Log Search where the query based on your rule is automatically run and matching results are listed.
Alternatively, you can set up custom actions manually on the Customize Actions page. However, using the log search, as described here, is quicker, easier and more versatile.